Docker Containers on Plesk
Contents
Setting up a Dockerised container might seem complicated, but with Layershift and Plesk it's extremely easy!
You're likely to need at least 512MiB of free RAM per container, but this may need to be higher depending on workload and image. Keep in mind that each Docker container adds to the overall resource requirements for your server. You can upgrade resources easily at any time; just reach out to our Support team if you need to add more!
Every Layershift VPS includes regular automated backups. The entire server filesystem is backed up on a frequency and retention scheduled according to your server's backup plan, but depending on your particular Docker image you might want to make additional arrangements, for example some database containers may not be properly restorable from a filesystem backup.
Although this article will help you to get set up using Docker on Plesk, we recommend that you also read the Plesk Documentation on the topic for additional context and guidance.
Installation
Docker comes pre-installed on all Layershift Plesk servers. Just look to the left hand panel and you should see an option labelled Docker.
If you are unable to see the extension, please contact our helpdesk.
Image Selection
Go to the Docker option in the left hand panel, then Run Container.
By default, Docker image search pulls images from Docker Hub, but you can also search other registries provided they're compatible with the docker search command (not all registries are) - for example quay.io/keycloak/keycloak will get you Keycloak from the Quay.io registry, whilst simply entering valkey will get you Valkey from Docker Hub.
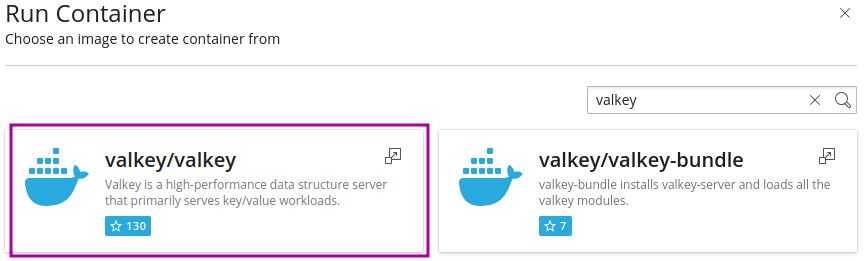
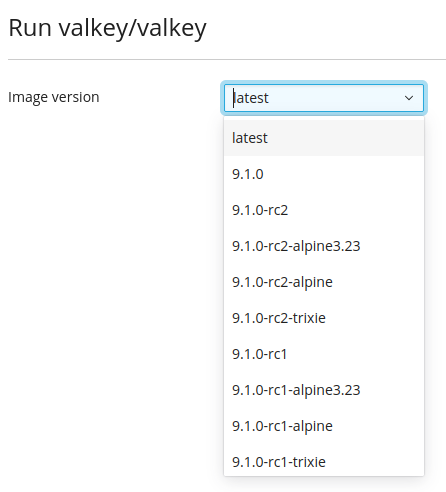
Search for your desired application image > Select specific image > Select version.
Below you can see the image results with the chosen option highlight in purple.
We recommend to avoid latest and prefer named version tags instead (to easily identify which version you have deployed later).
Upload Image
If you have your own custom image, the image resides in an unsupported registry (one that doesn't support docker search), or in a private registry, you can upload an image created with
docker save
directly to the server:
Click on the Images tab, and then the Upload image button.
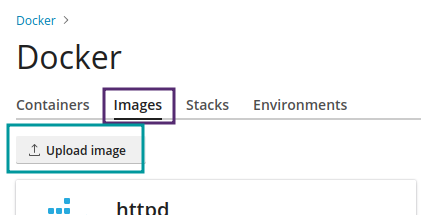
Choose the file from your computer, and click Upload to add it to the list of local images stored on your server.
Keep in mind that these images consume your VPS disk space, and can quickly add up (especially if you have multiple tags within each image).
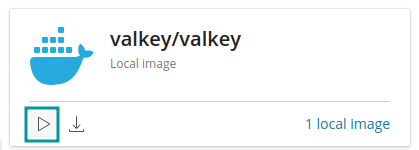
Once the image is uploaded, you can run it by pressing the Run button as highlighted below:
Memory Limits and Autostart
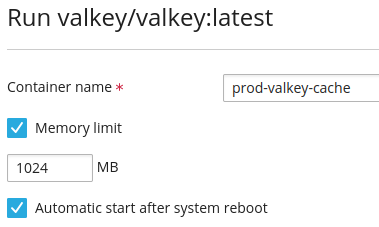
We now set the container name, any desired memory_limits and auto restart. These are shown in the image below with the memory_limit set to 1024Mb and auto-restart activated.
Mapping
Port Mapping
By default, Automatic port mapping selects an available host port for you. This is the recommended option for most deployments, as it helps avoid port conflicts.
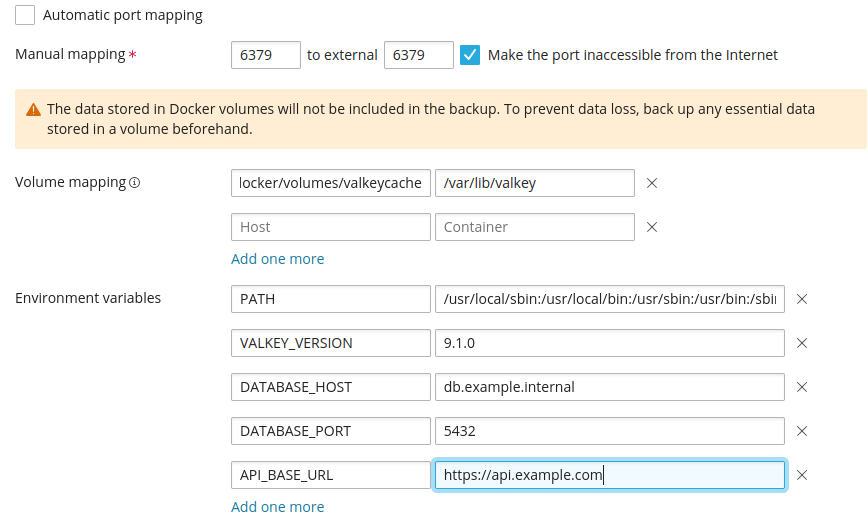
Disable Automatic port mapping only if you need your container to be available on a specific host port. When using manual mapping, you can specify both the container port and the host port, and choose whether the port is accessible from the internet. The service is always accessible from the server itself (127.0.0.1).
If the host port you choose is already in use by another service or container, the container will fail to bind to that port. This is known as a port conflict. If this happens, select a different host port or enable Automatic port mapping.
Choosing a Host Port
If you are manually assigning a host port:
- Use the standard port expected by your application where possible (for example: 3036 for MySQL, 5432 for PostgreSQL, 6379 for Valkey etc.).
- If that port is already in use, choose another unused registered port (1024 - 49151).
- Avoid well-known system ports (0 - 1023) and dynamic/ephemeral ports (49152 - 65535).
- On servers running other software, some ports are commonly already in use. For example, on a Plesk server, ports 3306 and 8443 are typically unavailable.
Volume Mapping
By default, data written or changed inside your Docker container is not persistent!
For some containers that's perfect, but for most you'll have at least some data that you want to keep hold of (e.g. if you're running a database server, you want to keep the files that represent the actual database).
A Docker volume is a directory on your server that you mount to a directory inside the container. The container can read and write to that directory, but cannot access anything above it (such as its parent directory).
You must use absolute paths for the Host and Container volume paths
We recommend to save all of your Docker volumes under /var/lib/docker/volumes (which is their usual location) on the server (Host) side.
In the example below, we mount a server directory at /var/lib/docker/volumes/valkeycache to /var/lib/valkey inside the container, which allows us to retain the /var/lib/valkey data across Valkey redeploys (e.g. updating Valkey version).

Docker volumes are excluded from backups created by Plesk's own backup tools; but your entire Layershift Managed VPS (including any Docker volumes) is backed up according to your selected backup plan.
Environment Variables
Docker containers are typically configured by setting environment variables.
The exact variables and their values are unique to the image you're using; please consult documentation for your chosen image to determine what values should be defined for your particular use case.
Firewall
If a mapped port is NOT set to "Make the port inaccessible to the internet" it will be accessible from the internet, even if you have that port blocked in the Plesk firewall.

Docker Proxy Rules
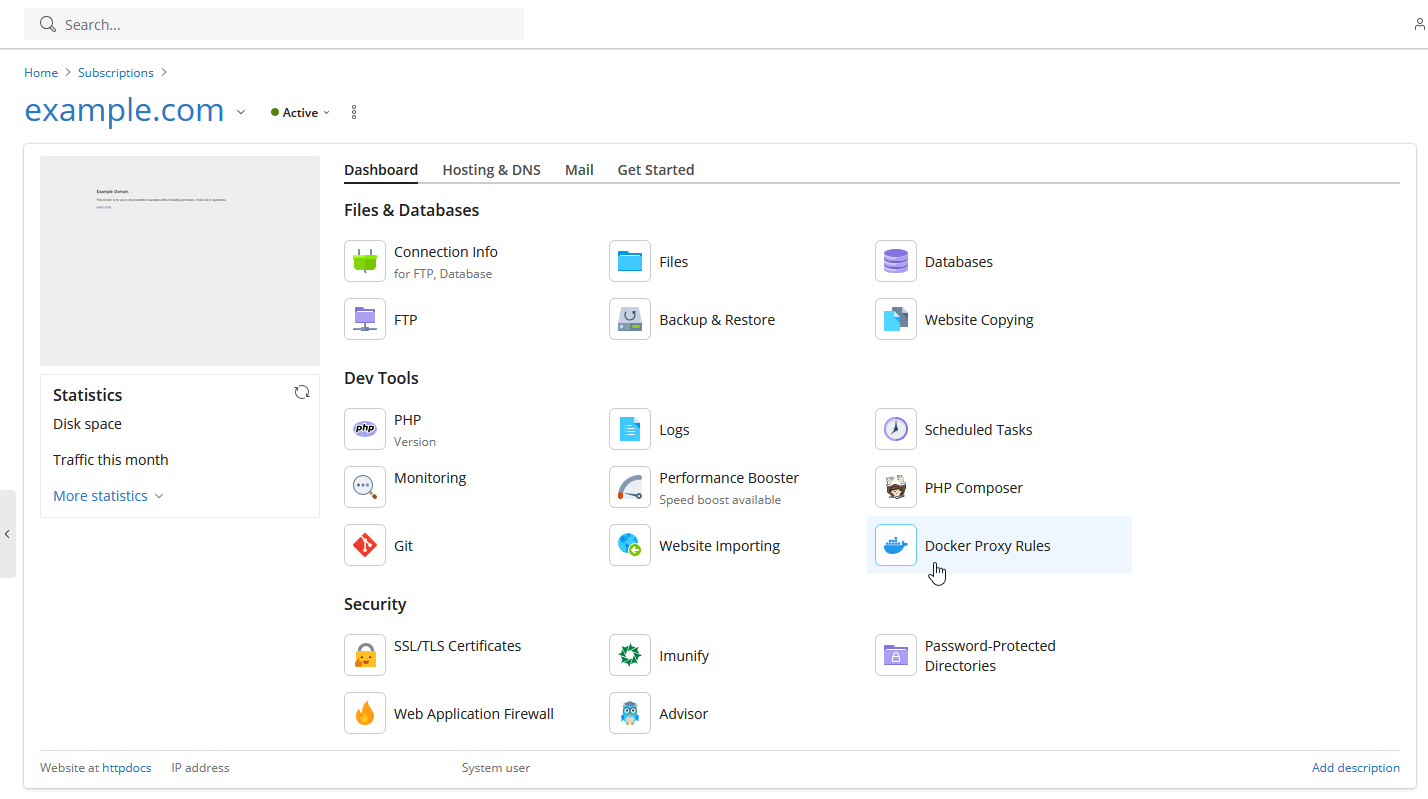
This is an extremely useful feature of Plesk Docker.
You can have all or part of your website served from a docker container.
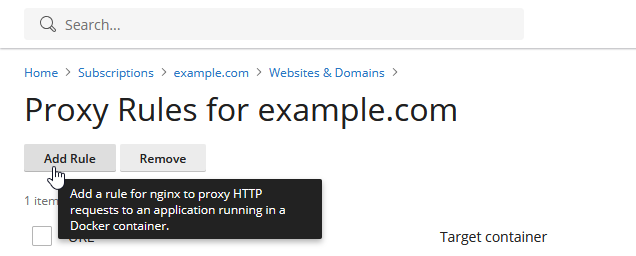
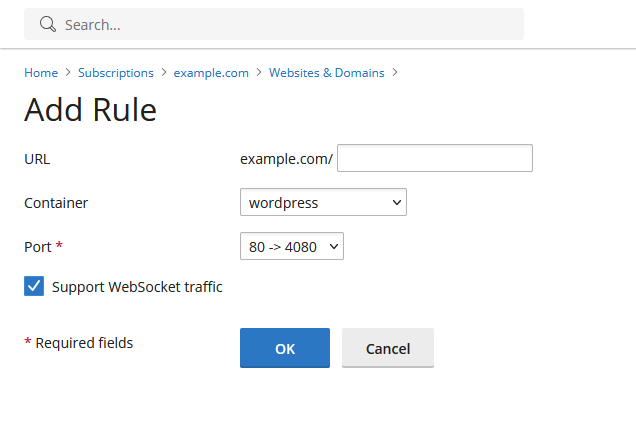
Each rule adds a location directive in the Nginx domain server block that will proxy_pass reqeusts to the selected host ports defined in the port mapping.
        location ~ ^/.* {
                proxy_pass http://127.0.0.1:4080;
                proxy_set_header Host              $host;
                proxy_set_header X-Real-IP         $remote_addr;
                proxy_set_header X-Forwarded-For   $proxy_add_x_forwarded_for;
                proxy_set_header X-Forwarded-Proto $scheme;
        }
Enabling Support WebSocket traffic the above location will look like this
        location ~ ^/.* {
                proxy_pass http://127.0.0.1:4080;
                proxy_set_header Host              $host;
                proxy_set_header X-Real-IP         $remote_addr;
                proxy_set_header X-Forwarded-For   $proxy_add_x_forwarded_for;
                proxy_set_header X-Forwarded-Proto $scheme;
                proxy_set_header Upgrade $http_upgrade;
                proxy_set_header Connection "upgrade";
                proxy_http_version 1.1;
        }
Removal
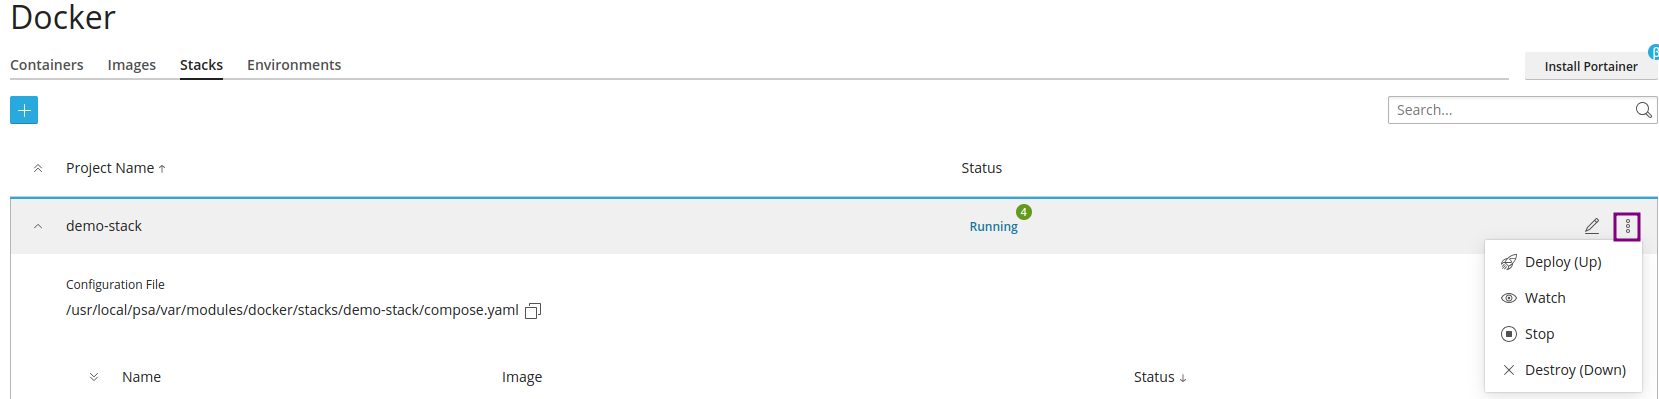
Stopping or removing a stack can be done through the highlighted button below.
License
You do not need a license to manage the local Docker service running on your Layershift Plesk server.
A paid license option is available to enable you to manage Docker containers hosted on multiple different servers from a single interface, but managing containers hosted locally by a single Layershift Managed VPS is included at no additional cost. For additional details please contact our helpdesk.